Monday, January 27, 2014

Running Lately + Yoga

Do you ever feel like you just ran like the wind, finished up like a total champ, but then come to find out that you really didn't go much faster than your normal pace? I had one of those runs. Felt like the world played a dirty trick on me!
Here on my latest long run I completed a healthy 4.87 miles in just over 41 minutes. I made an extra effort to get up the hills and took advantage of the flat and downhill sections. I could have sworn that my pace was closer to an 8:15 mile.
Nope. 8:27 was it. Lately my pace has been right there around an 8:30 mile for most runs, so I wasn't far off from the usual. Now I'm not a regular racer, but I do want to work on getting faster. And although I have a strong, fit body I really have to work at it if I want to be fast. And that work is hard.

From what I remember from my cross country and track days, the way to get faster is to practice running fast. Seems simple enough, but that's definitely an "easier said than done" concept. Then I remember back to the 1-mile fast-as-you-can-go repeats with only about a minute of rest in between, and the 400-meter sprints where another repeat would start every 2 minutes, and the ladder workouts. Those workouts hurt a lot, but they worked. More on speed work later. 

On a different note, yoga and flexibility. I've been slacking off in the stretching department lately and I can really feel the effects of it. Having tight muscles, a sore back, and rickety-feeling hips is no fun. My plan is to start doing more yoga on a somewhat regular schedule so I can increase my flexibility, and also, it's good for the soul, ya know. 

But there's one small problem. Along with spiders, car accidents, and breaking a tooth, yoga is one of my greatest fears in life. I have a hard time approaching it as exercise because it is so different from my usual cardio workouts. To me, exercise means high-intesnity, high-energy, sweat-inducing challenges combined with loud music. Yes, yoga can be those things (but the music is quieter), and I always appreciate the opportunity to go barefoot. But the thought of incorporating balance, flexibility, and mental focus all into one workout session is so highly daunting to me that I usually just go for a run so I don't have to think about it. 

Well the other day I had some time to spare and hopped onto DoYogaWithMe to finally face a yoga class. I found a 45 minute class called "Power Yoga with Twists" and completed the first 20 minutes of it. I've completed full yoga classes before, but perhaps I've been out of practice for too long now, thus explaining my completion of less than half of this recent session.

Then after perusing the Women's Health website for mere minutes this morning, I stumbled across this yoga article which I think addressed my yoga issues perfectly right now: Yoga for Everyday Athletes. 
The article addresses how regular exercisers can do themselves harm through the sports or workouts in which they participate:

Whether you're a new runner, total gym rat, or summer-only tennis fanatic, a yoga instructor can tell. That's because workouts that emphasize running, lifting, and swinging movements leave the telltale signs of tight hamstrings, quads, and shoulders—the trifecta of treacherous spots in fit females.

Hence, the WH yoga workout suggested sequences 6 different moves that help stretch, loosen, and balance the muscles which can lead to stronger workouts in the future.

I think the universe directed me to this article intentionally.  

And although I prefer a traditional yoga class or a video to follow instead of pictures that I should observe and follow, I think I can incorporate these six moves into my fitness routine. Not to mention, I'm already familiar with half of them. 

Downward-Facing Dog
High Lunge
Twisted Lunge
Dolphin
Pigeon
Legs up the Wall
Click over the the full article for full instructions. Each move is explained along with the benefits it provides...as if you didn't already know that yoga can be beneficial. Now go have a happy time running and stretching!

Monday, January 20, 2014

Deluxe BBQ Chicken Pizza

When I made a barbecue chicken and pineapple pizza with sharp cheddar, I thought I really had something there. And at the time, I did. But then the world of Pinterest presented to me an even better version of something I thought couldn't be topped. And here it is…
It's still a BBQ chicken pizza with pineapple chunks, but so much more…red onions, bacon, and jalapeños.  I am still recovering from this delight and can't possibly fathom improving upon this pizza any further.

Also, I did a twice-baked crust to make it a bit crispier. Lately my crusts have had a little "mush" layer just beneath the toppings, and although it does not ruin the meal it certainly causes a distraction. To eliminate the mush layer, simply bake your crust for 3 to 4 minutes before putting the toppings on, then remove it from the oven, top it with all the good stuff, and bake it again until it's done. Just that one extra step is completely worth the work.

Toppings you'll need:
  • About 1 cup pizza sauce
  • 1/4 to 1/3 cup barbecue sauce, more or less depending on your preference
  • 1 chicken breast, cooked and chopped into bite-sized pieces
  • 1/2 red onion, sliced and cooked
  • 2-3 slices bacon, cooked and crumbled into bits
  • 1/2 can (about 1/2 cup) pineapple chunks
  • Handful of jalapeños, to taste
  • 1/2 cup shredded mozzarella cheese
  • 1/2 cup shredded sharp cheddar cheese

If you don't have your chicken and onions all ready to go, cooking these is very simple.
  • All I did for mine was slice the onion and chicken breast very thin, place the onions onto an oiled baking sheet, and place the chicken on top of the onions. That goes into the oven at 350 for about 20 minutes, or until the chicken is cooked through. The only thing I would have done differently is use more red onions. I only used half of a medium red onion, but using the whole thing would have satisfied me even more. But that's purely a matter of taste - use the amount of onion that makes you happy.
  • When the chicken is cooked, remove the baking sheet from the oven and chop everything that was on it into bite-sized pieces. Set it aside while you prepare the rest, or put it in the fridge if it's going to be more than a few minutes before you start the rest of the za making.

Let us now start with the real business we came here for: to make an epic pizza.

  • Preheat the oven to 500, making sure your pizza stone is inside.
  • Gather everything you plan to put on the pizza (cooked chicken and onions, crumbled bacon, drained pineapple chunks, sauces, and shredded cheeses). Once you have your dough ready, you need to work with the swiftness. 

  • If you want to do the crispy crust thing like I did, make sure your dough is ready to go (prepped and cut just smaller then the pizza stone). When the oven reached 500, take the pizza stone out and put just the dough for the crust on it - no toppings just yet. (Or if you're really crafty, slide the dough right onto the stone without removing it from the oven at all. 
    • Now you're going to have to keep an eye on it so it doesn't cook too much, but generally it should take no more than 4 minutes to crisp it up a little bit. 
    • Remove the stone with the dough on top from the oven and get ready to place your toppings on it next. 
It may be a little bit lumpy or bubbly looking if you're doing this step, but don't worry, it will all be just fine. Generally, kneading and rolling out your dough gets rid of the air bubbles within it, but obviously I don't have that art down to perfection just yet. If your crust begins to look like this, simply press down the bubbly parts with a spatula (not your hand 'cause it's freakin' hot!), or pop them with a knife to deflate them a bit. 
  • Working with your pizza stone on a stable surface, evenly spread your pizza sauce onto the crust.
  • Spread (or squeeze from a bottle) about half of your barbecue sauce onto the crust next. If you like your barbecue sauce more than pizza sauce, you can adjust the ratios of those. But don't worry - you will be adding more barbecue sauce in the last step. 
  • Sprinkle on all the rest of the toppings (onions, chicken, pineapples, jalapeños, and bacon). Make sure they are evenly distributed around the pizza. You may prefer more or less jalapeños depending on your tolerance of hot and spicy things. 
  • Sprinkle on the cheeses last (you can mix them or just sprinkle on one after the other) and carefully place the whole thing back into the oven.
  • Now if you did the pre-bake on your crust, you won't need it in the oven very long before it's done. Perhaps 5 or 6 minutes should do it. If you didn't pre-bake, then this will take about 10 minutes until it is complete. My best advice is to keep an eye on it and take it out when it's as done as you like it. (Golden edges on the crust and melted cheese on top can usually indicate a done pizza.)
Golden and melty and DONE!
  • Remove the pizza from the oven and spread or squeeze the remainder of your barbecue sauce on top. Let it cool for a few minutes (the pineapple pieces get hot in a 500-degree oven and they stay hot the longest). 
Mmm. Get into ma belly.
So, so, so good. Typically I do add-ons to my slices…nothing unusual - maybe just some red pepper flakes or a side of sauce for dipping. But I can say with confidence that this pizza needed nothing! It was a stand-alone winner and a Friday night delight. 

Monday, January 13, 2014

Pepperoni, Zucchini and Gorgonzola Pizza

Have you ever cooked with gorgonzola cheese? Using it on this pizza was my inaugural use of this delicacy. Calling it's flavor "sharp" would be a euphemism. "Pungent" may in fact be more accurate. I would say that you should know that you like it before you start using it. Or at the very least, use it sparingly.
Now I'm not trying to cyber-bully a particular cheese here. I'm not saying it was bad - far from it really. I very much liked the za I created with it. The other ingredients were particularly appetizing, however, because of the amount of gorgonzola I used, their flavors were more masked than I would have cared for. I would easily use gorgonzola in cooking again, but I would be more conservative with it in the future.

If you really think or know you're going to hate it and refuse to read further if I mention the word "gorgonzola" again, then by all means, omit it. You could use feta or goat cheese in its place, or you could even go with a sprinkling of parmesan if that's more your style.

Regardless, I will share with you the pizza making process for this delightful meal.

Ingredients needed:
  • Pizza dough or prepared crust
  • 1-2 cups pizza sauce
  • 2 small zucchinis
  • 10 thinly-sliced deli pepperonis
  • 1/4 cup gorgonzola cheese (more or less, to taste)
  • 2 teaspoons black pepper
  • About 1 cup shredded mozzarella cheese

So, the preparation begins.
  • Place a pizza stone into a cold oven, then crank the oven to 500. 
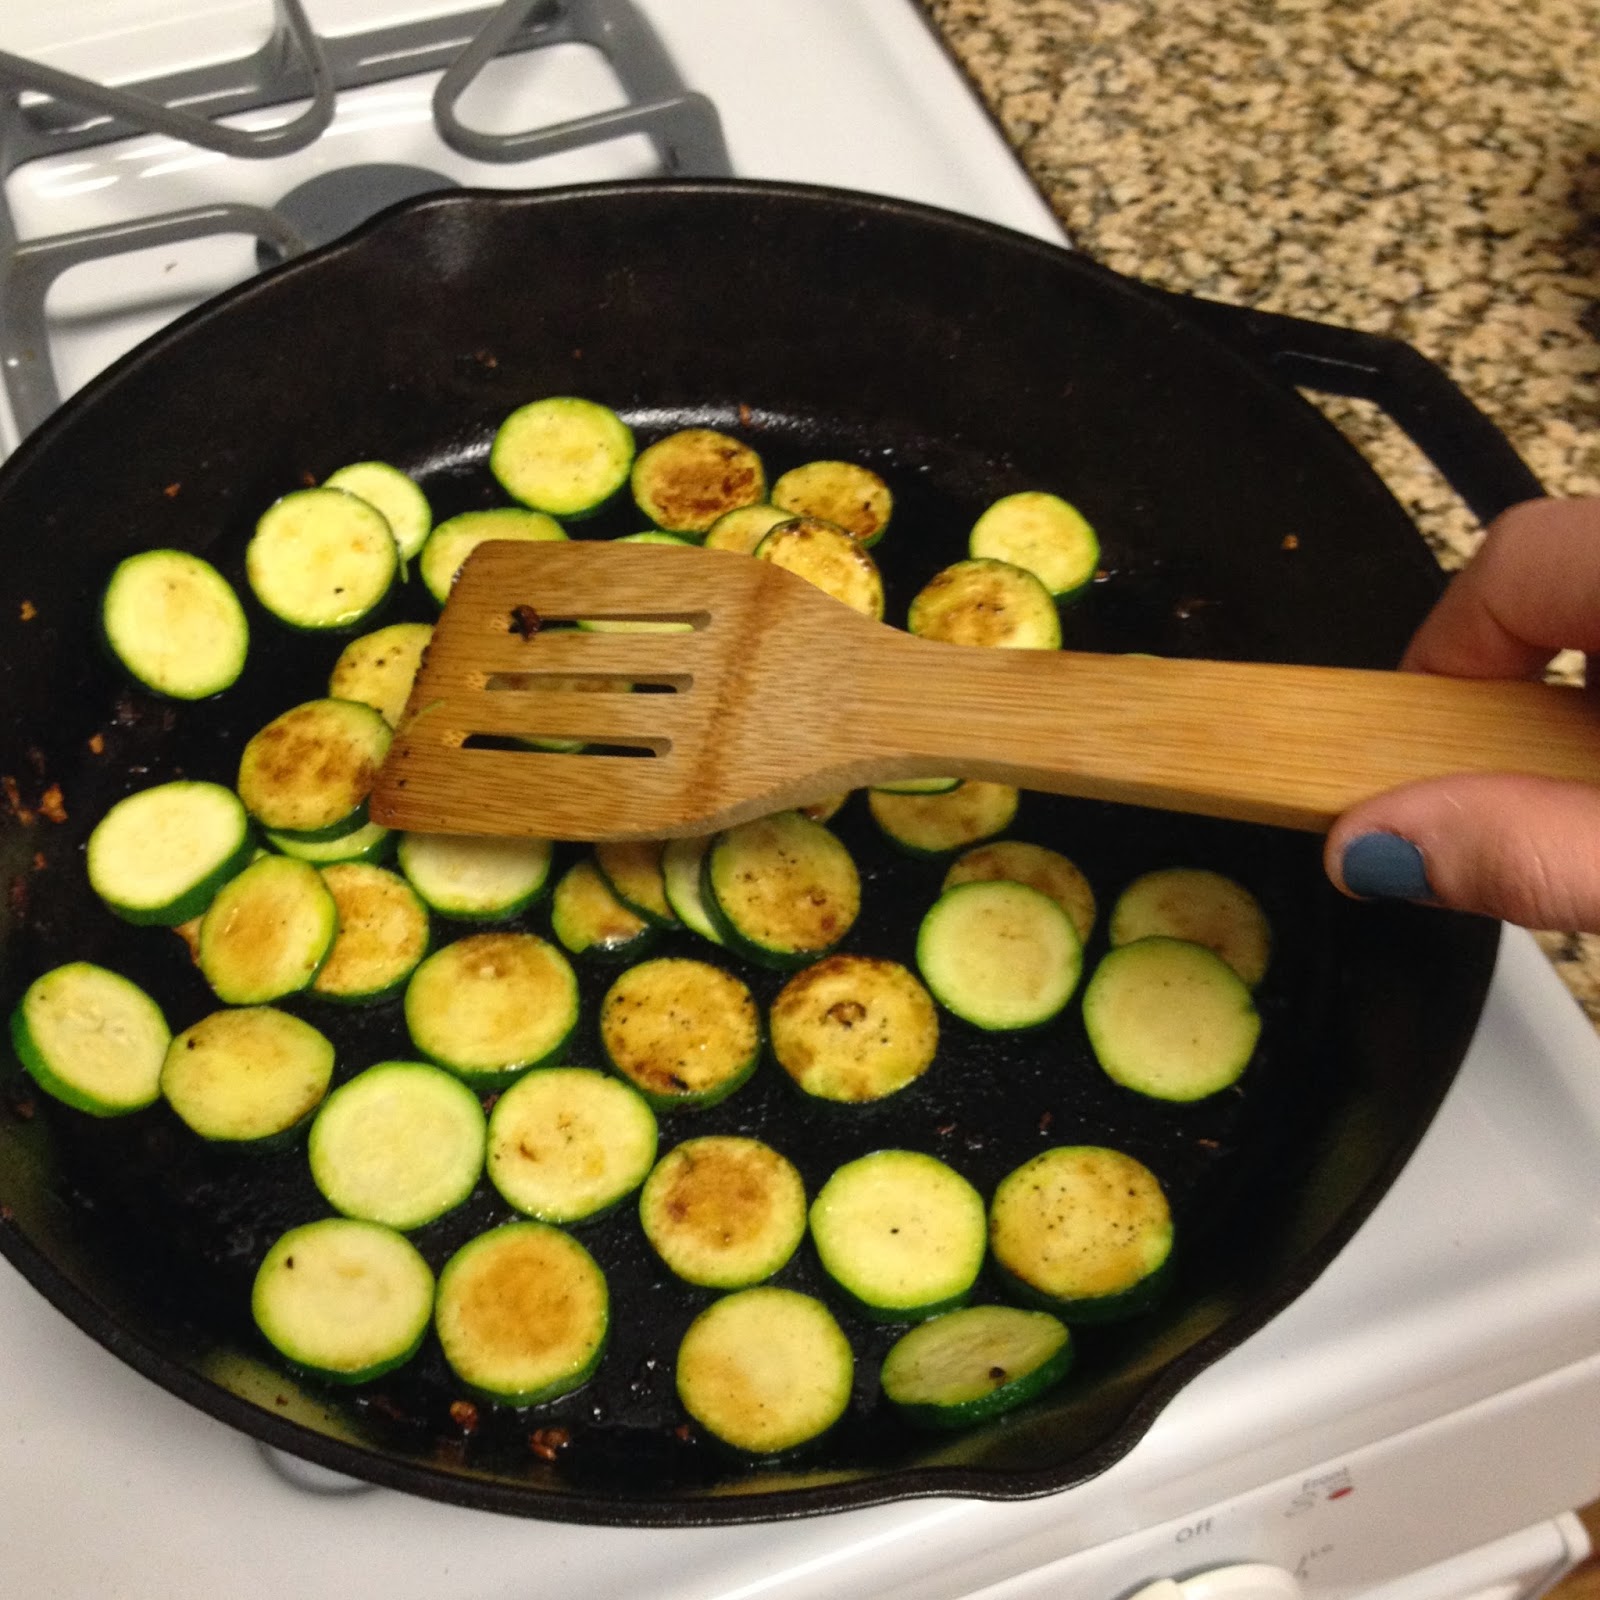
  • Heat a skillet on the stovetop over medium-high heat with a tablespoon or so of olive oil. Get your zucchinis cleaned. Slice them into "coins." Toss them into the heated skillet and sauté them until they are golden-brown on each side. 
Cleaned.

Coined.

Sautéed. 
  • While the zucchini is browning, prepare your pepperonis. The ones I got at the deli counter were rather large (perhaps 3 inches in diameter), so I cut them into quarters to make them more bite-sized. These things should be fully-cooked when you buy them, and I couldn't help myself from taking a little sample of a bite of one before I assembled the za. Oh my. Yum. It was definitely a good choice to go with the deli pepperoni rather than ones that come pre-packaged from elsewhere in the grocery store. And since I only bought 10 thin slices, this was actually the more money-saving option as well.
  • Once the pizza stone is thoroughly heated, remove it from the oven. Place your prepared pizza dough or crust on it and spread as much pizza sauce on top of that as you'd like. 
  • Next, pile on all those tasty ingredients that you just prepared. Start with the zucchinis, evenly spacing them all around. Pepperonis go all over next, then sprinkle on your gorgonzola, black pepper, and finally, mozzarella. If you're a true gorgonzola fanatic, you may like to sprinkle some more on the very top of the za. But I'll leave that up to you.
  • Pop the stone with all that delightfulness on top back into the oven and keep it in there until everything is hot, melty, and the cheese is slightly golden on top. This time it only took my za about 8 minutes to cook, but typically I expect to wait around 10 minutes for a completed pizza. 
See? Beautifully golden and melty in all of 8 minutes. Careful though. This thing is hella hot. Seeing how the crust is even a bit burned on the front edge tells me that I could have taken it out of the oven even sooner. But it was still delish, and that one little burt section of crust didn't take away from the delightful toppings at all. Or maybe it was my husband that ate the slice from that side. Hm. Either way, no trouble here at all!
Lastly, I did a wee little change-up for the crust of this za. I did everything as usual when I make my normal crust, but instead of using warm water I used warm beer. This was not the same as another crust I did involving beer (a personal favorite of mine right there), but it was still delicious - crispy and classic yet it had a slightly deeper and more complex flavor.

Any beer will do (I used Coors Light); just try not to be too repulsed after warming it up in the microwave, adding honey and yeast to it, and waiting for it to froth up. It's all part of a much bigger and more important process. And an added bonus - you only use 3/4 cup of beer, so you'll have a few swigs left over to enjoy while you prepare the rest of the recipe. You are welcome.

Thursday, January 9, 2014

Equipment-Free Workout

For two reasons, I am so very excited to share my recent workout.

First, it was a wonderfully refreshing and invigorating workout. Lately I've been doing mostly running as well as 25 push-ups and 50 crunches per day. Good workouts, sure, but those can become mundane after a short while.

Second, getting in a workout like this is a good reminder that I am well on the up-side of recovery from the winter crud…at least 95% better, in my opinion. Just a little sniffle here and a few coughs there, but nothing to run to the doctor about.

I was inspired by a workout I found from Women's Health. Actually, I confess, it's been probably a year since I first discovered the workout, bookmarked it, then put it off indefinitely.

There are just 4 moves involved in this workout, and I incorporated some running for more of a cardio boost. The following images show a good example of how each move is done, but for a more detailed explanation, head to the actual link from Women's Health.

Move 1: Squat and kick

Move 2: Jumping lunge


Move 3: Push-ups

Move 4: Mountain climber


Women's Health explains that you can do a workout with these moves according to the following instructions: Do the first move for 30 seconds, then do the second one for 30 seconds. Rest one minute; repeat three more times. Perform the third and fourth moves in this same pattern. Push yourself to do more reps during each successive workout.

Now that is a good workout and all, and if you're crunched for time it's definitely going to serve you well.

Here's how I did it though:
  • Warm-up: 5 minute jog at a medium pace
    1. Move 1: 20 seconds, 10 seconds rest
    2. Move 2: 20 seconds, 10 seconds rest
    3. Move 3: 20 seconds, 10 seconds rest
    4. Move 4: 20 seconds, 10 seconds rest
    5. Run 800m (2 laps) on a 400m track at about 8 min/mile pace
  • Repeat (1 through 5) 4 times
  • Cool-down: Walk 2-3 minutes, then jog slow for about 5 minutes; stretch and hydrate

Friday, January 3, 2014

Creamy Spinach and Artichoke Pizza

Happy New Year! I'm glad to say that the first pizza of 2014 is one I can brag about.
I've been rather down with the sickness since Christmas. Apparently spending the holidays among droves of children can lead one to contract an illness rather easily. So after plenty of bed rest, gallons of chicken noodle soup, and just enough Tylenol and Robitussin to give me a good night's sleep, I'm more or less back on my feet and doing things around the house (but not ready to do things around the gym just yet).

All this sickness has deprived me of my usual appetite for the past week or so, and now that it's coming back, I decided I wanted something good and hearty. Something that sticks to the ribs. Some sort of comfort food. Yes, pizza is all of those, usually; but I really wanted it to be rich this time. And that's when I thought of spinach artichoke dip. It ranks high among my guilty pleasures, even when I make a "healthier" version of it (because let's be honest, you can only be so healthy with a cream-cheese based meal).

And alas, I developed the Creamy Spinach and Artichoke pizza. Basically, it's topped with what you'd find in a spinach-artichoke dip, but it sits deliciously atop a round of fresh dough and pizza sauce, topped with shredded, melty mozzarella.

For this culinary delight, you will need:
  • 1-2 cups pizza sauce
  • 1/2 medium onion, diced
  • 1/2 8-oz package of cream cheese
  • 1-2 Tablespoons half and half
  • 2 cups fresh spinach leaves, chopped
  • 1-2 Tablespoons garlic powder
  • 1-2 teaspoons black pepper
  • 1-2 cups shredded mozzarella cheese
  • 1 6-oz jar marinated artichoke hearts, sliced
Of course I used the cream cheese with a wee bit less fat (so I can feel a wee bit less guilty about eating it). If you'd like to use heavy whipping cream in place of the half and half, that would work too. (Half and half was just a little cheaper at the grocery store for me this time around). It's a good idea to leave these ingredients on the counter for a little while so that they reach room temperature before you begin cooking. Stuff just turns out better (usually) if it's near the same temperature before you begin.
Now grab your fancy apron, and get started.

First things first: your oven and your pizza stone. Turn that machine to 500 degrees with the stone inside. Make it all nice and hot.

Next, heat a skillet over medium heat with a small bit of oil on it. Dice your onion, and toss the pieces into the skillet, stirring until slightly browned. Remove from the skillet and allow to cool slightly. 

Chop the spinach and set it aside. 

In the bowl of a mixer, place the cream cheese, half and half, garlic powder, and black pepper. Mix it on up until it's well combined. Add more half and half, slowly, if you prefer a thinner consistency. 

Next, mix in the sautéed onion pieces, followed by the chopped spinach. It should just look like a big creamy, oniony mixture with spinach in it. Yum.
Mmm. Onions n stuff.
Next, slice up the artichoke hearts. The ones I buy are already chopped into pieces, but I prefer to make those a little thinner so they're easier to eat and I can spread more of them around the za.
Now given that your dough and sauce are ready, your pizza is ready to assemble.

Remove the pizza stone from the hot oven and place it on a stable, heat-proof work surface. Hot pads on the counter serve me just fine. Place the prepared dough on that and spread as much pizza sauce as you care for on top of your dough.

Next is the creamy, oniony, spinachy mixture. Using a teaspoon, scoop up spoonfuls of the stuff and drop them evenly around the pizza in little globs. It's okay if there are spots that you missed or if the globs aren't quite equal in size. That will all even out when it goes back in the oven. Once you've used all the creamy mixture, sprinkle shredded mozzarella all around on top of that. Finally, place the sliced artichoke hearts on top. If you'd like a little more mozzarella (or noticed that you missed a spot), now is the time for touch-ups with that cheese.

Now pop the whole thing back in the oven and set the timer for 10 minutes. You will be delighted at the results.
Delightful, no?
This za lends itself to many different flavors and options to "dress it up." You could add some red pepper flakes for some spice, parmesan cheese for more of a bite, or any other herbs and spices that you like. Cream cheese is rather plain and takes well to many sweet, savory, and spicy variations. I just kept it simple (partially because I didn't want to irritate my sore throat and sinuses any more, partially because I was lazy), but it was definitely the perfect meal with just enough of each flavor element to bring me out of the sickness and back into the pizza eating frame of mind.